
As a falconer, training raptors for free flight represents one of the most rewarding yet challenging aspects of the craft. The process requires patience, consistency, and a deep understanding of raptor behavior. Whether working with a rehabilitation bird or a falconry partner, mastering free flight training creates a unique bond of trust and communication essential for successful releases or hunting.
In this step-by-step guide, I will walk you through the exact process for free flight and the order you should go about it.
Understanding the Importance of Free Flight Training
Raptors in the wild maintain peak fitness through hours of daily flying. In captivity, they spend up to 95% of their time perched, quickly losing crucial muscle tone. After just 14 days in care, a raptor loses enough fitness to struggle with hunting upon release. Free flight training solves this problem by allowing birds to exercise without the constraints of an enclosure, building the stamina and skills needed for survival.

The Communication Bond
The entire process of teaching a bird to fly free is based on forming a type of communication with the bird. This relationship requires creating a common language through visual commands, audio cues, or a combination of both. Each bird responds as an individual, requiring personalized approaches for different types of training.
Step 1: Manning – Building Trust
Manning forms the foundation of all raptor training—getting the bird comfortable enough with human presence to allow handling without stress.
Manning Process:
- Spend consistent time near the bird
- Use positive reinforcement for movements toward you
- Allow the bird to retreat if uncomfortable
- Progress at the bird’s own pace
- Consider the bird successfully manned when it accepts food from your glove without stress
While historically, birds were tethered during this process, better results often come from allowing retreat options. A successfully manned bird will pose minimal risk to handlers and will return to wild behaviors quickly after release.
Step 2: In-Aviary Flights to the Fist
Once your raptor trusts you, the next step involves encouraging short flights to your gloved hand within the security of the mew or aviary.
Training Progression:
- Begin with the bird jumping off a perch to your fist for food rewards
- Gradually increase the distance as confidence builds
- Conduct training in the familiar aviary environment to minimize distractions
- Ensure the bird performs jumps without hesitation before moving outdoors
This work requires no equipment attached to the bird and provides a foundation for outdoor flights.
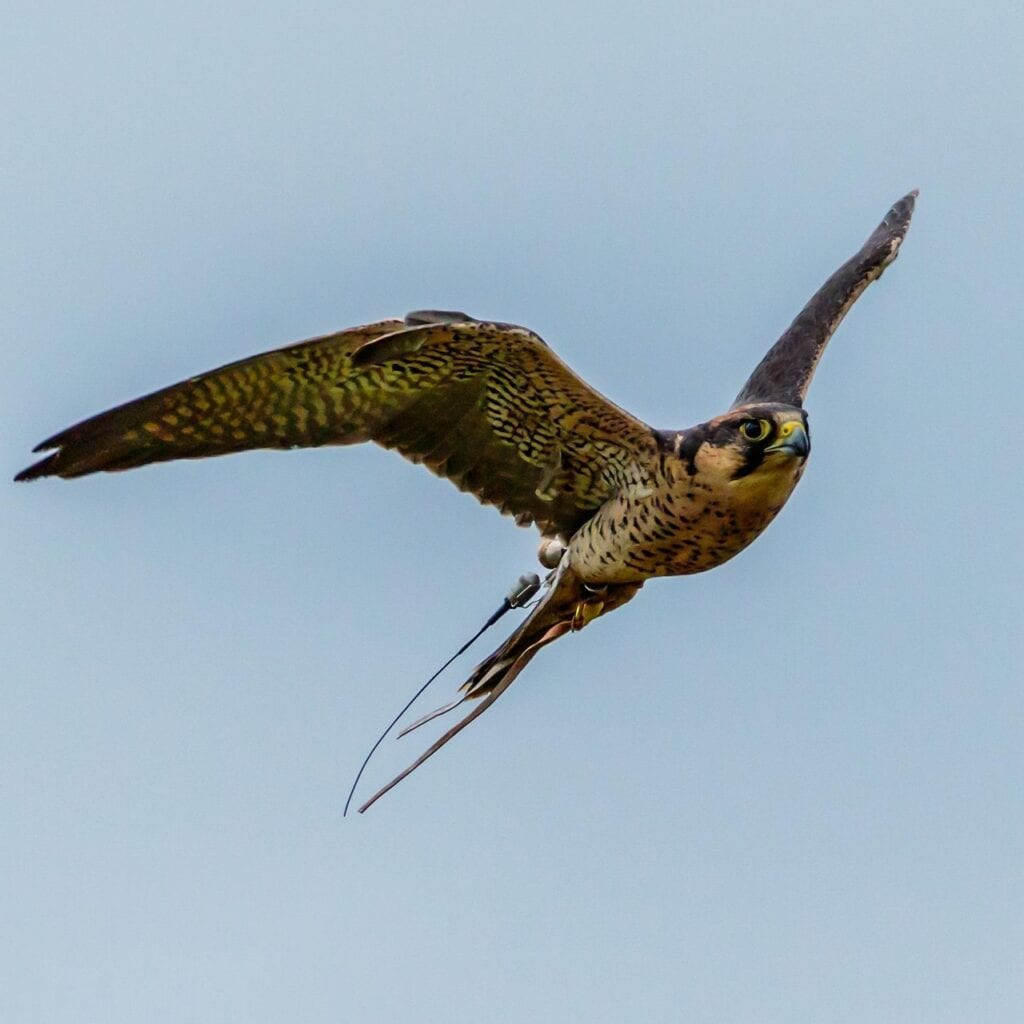
Step 3: Transitioning Outdoors
Taking your raptor outside represents a significant milestone in training.
The bird will need time to adjust to new stimuli while maintaining focus on training. Begin by simply carrying the manned bird outdoors, allowing it to observe the new environment while feeling secure on the glove. This exposure builds confidence for subsequent training steps.
Step 4: Leash and Creance Training
Safety remains paramount when beginning outdoor flights. This phase employs a “creance“—a long cord attached to the bird’s jesses to prevent escape while allowing extended flight practice.
Creance Training Protocol:
- Attach the weighted creance line to the bird’s jesses
- Begin with short distances of 10-15 feet
- Incrementally increase the distance as the bird shows confidence
- Introduce the lure (for falcons) or direct glove returns (for hawks)
- Practice in various conditions to build adaptability
This safety mechanism prevents the bird from escaping while being flown outdoors. The creance allows assessment of flying ability without enclosure constraints.

Step 5: Introducing the Hunting Simulation
Before free flight, train your bird to pursue prey simulations while still on the creance line.
Simulation Techniques by Species:
- Falcons: Train to catch a swinging lure simulating birds in flight
- Hawks: Practice chasing ground lures
- Eagles: Develop stooping skills to capture ground targets
These exercises develop crucial hunting skills that cannot be adequately assessed inside an aviary. For falcons specifically, this phase includes teaching them to “wait on” (circle above) at progressively higher altitudes and respond to the lure.
Step 6: The First Free Flight
The maiden voyage into free flight often feels harrowing for the falconer, as weeks of training culminated in removing the safety line.
Preparing for the First Free Flight:
| Requirement | Details |
|---|---|
| Weather | Perfect conditions—not windy or rainy |
| Weight | Bird at or below target flying weight |
| Location | Familiar training area with minimal distractions |
| Equipment | Bells and/or telemetry properly attached |
| Technique | Simplify training to earlier, more comfortable steps |
For the first free flight, return several steps in your training program. A bird that has been flying 20 meters to an aerial lure should start with short jumps to a ground lure. The bird will notice the absence of the creance’s drag and typically fly faster, so simplifying the task builds confidence.
Always position the bird to fly into any breeze for easier flight control. Once the first flight succeeds, progression to previous training levels happens quickly.
Step 7: Building Fitness and Range
After achieving free flight, focus on building the bird’s endurance and hunting skills.
With proper lure-hunting exercises, you can fully assess whether your patient will survive once released back to the wild. This phase extends into actual hunting practice for falconry birds with progressively more challenging quarry.
For falcons specifically, training to “wait on” high above the falconer requires gradually building altitude. Some peregrines naturally achieve heights of 1,000-3,000 feet, while others may prefer lower altitudes around 200 feet.

Tracking Technology
Modern free flight training benefits from telemetry equipment. A transmitter temporarily attached to the leg or tail feather emits a radio signal tracked with a portable receiver. This technology provides peace of mind during the training process and can be lifesaving if a bird flies beyond the visual range.
Conclusion
Free-flying raptors prior to release have proven the most efficient way to prepare these ultimate predators for returning to the wild. The process isn’t true falconry in the traditional sense—you’re not hunting with the bird—but rather using falconry techniques to help build fitness and improve hunting skills on inanimate lures.
The knowledge gained through this process extends beyond raptors to other species. The power of positive reinforcement combined with careful observation creates a training approach limited only by the trainer’s vision. While challenging, few experiences in wildlife rehabilitation or falconry match the satisfaction of watching a perfectly trained raptor soar freely before returning voluntarily to your glove.
Take Your Raptor Training to the Next Level!
Now that you understand the fundamentals of free flight training, explore advanced techniques, expert insights, and real-world success stories with our related topics below:
Mastering Recall Training: The Art of Building Trust with Your Bird of Prey